I have been recently working in a project where i had to make a Matlab toolbox, so I searched the net but could not find a good solution where it was explained properly.So that made me to write this post and tell you about adding your own toolbox in matlab start button. The post is pretty explanatory in nature and also includes pictures which makes it more comprehensive.
Follow the steps :
Step 1: First of all write down your Matlab (.m) file that you want include in the
Start button-> toolbox.
Step 2: Then make a directory (For example : MyToolbox) and name it such that it explains your toolbox.
Step 3: You can keep the directory anywhere you want but I kept it in the path
C:\Program Files\MATLAB\R2011a\toolbox\.
Step 4: Now copy all the .m file to the directory (MyToolbox).
Step 5: Copy the info_template.xml from the path
“\MATLAB\R2011a\help\techdoc\matlab_env\examples\templates\”.
Step 6: Then paste it in the MyToolbox directory and also rename it to info.xml.
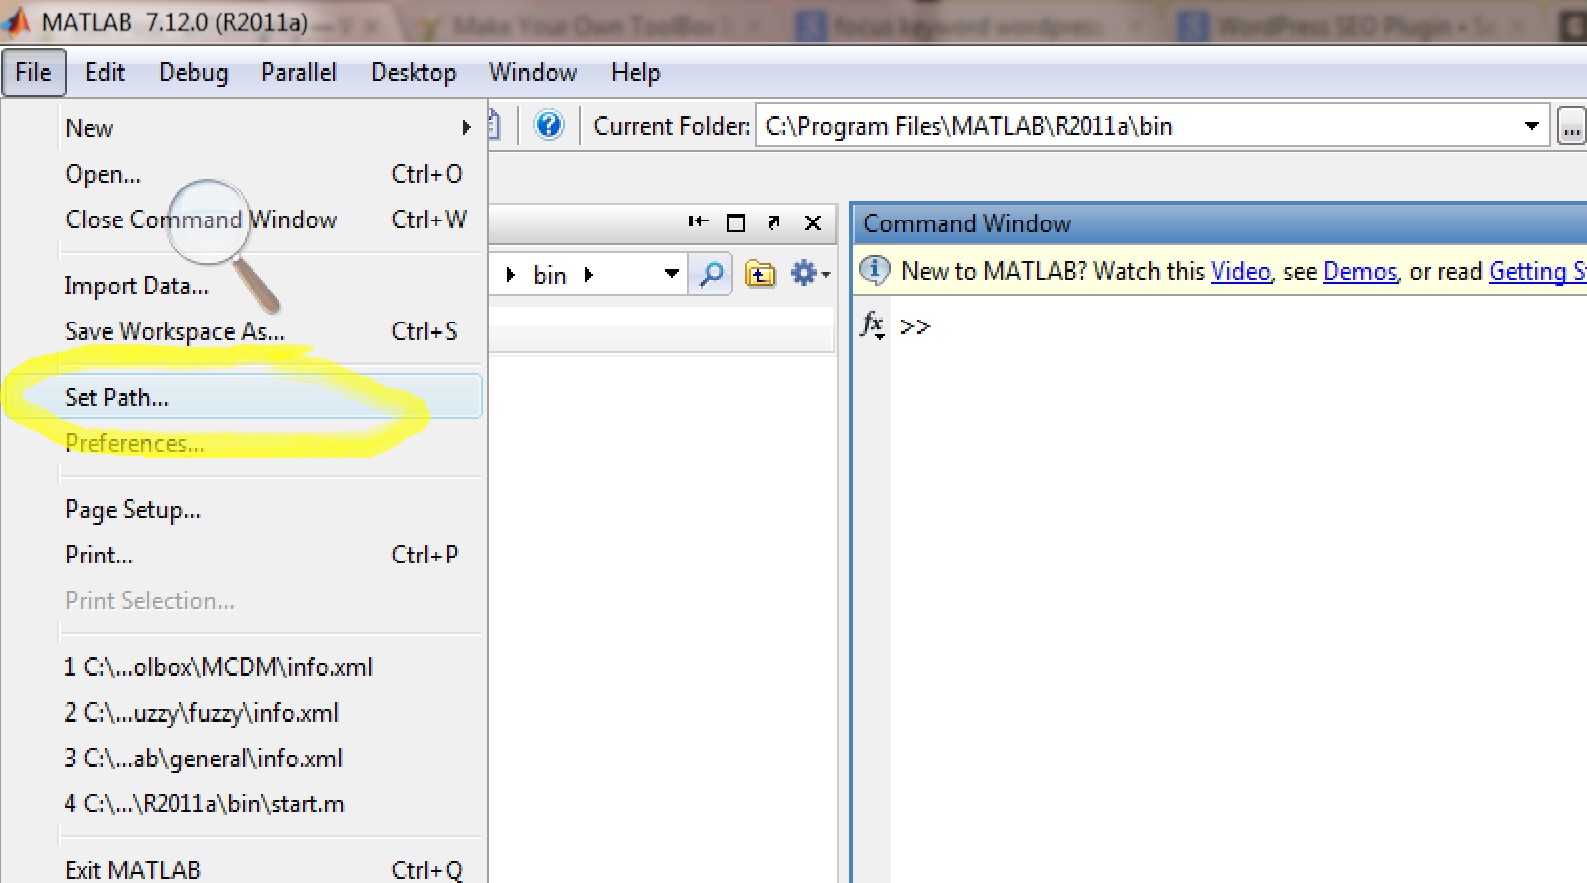
Step 7: Now open Matlab and click on to
File->Set Path
In the Set Path dialogue box click to Addfolder
then navigate to MyToolbox folder and click Ok.
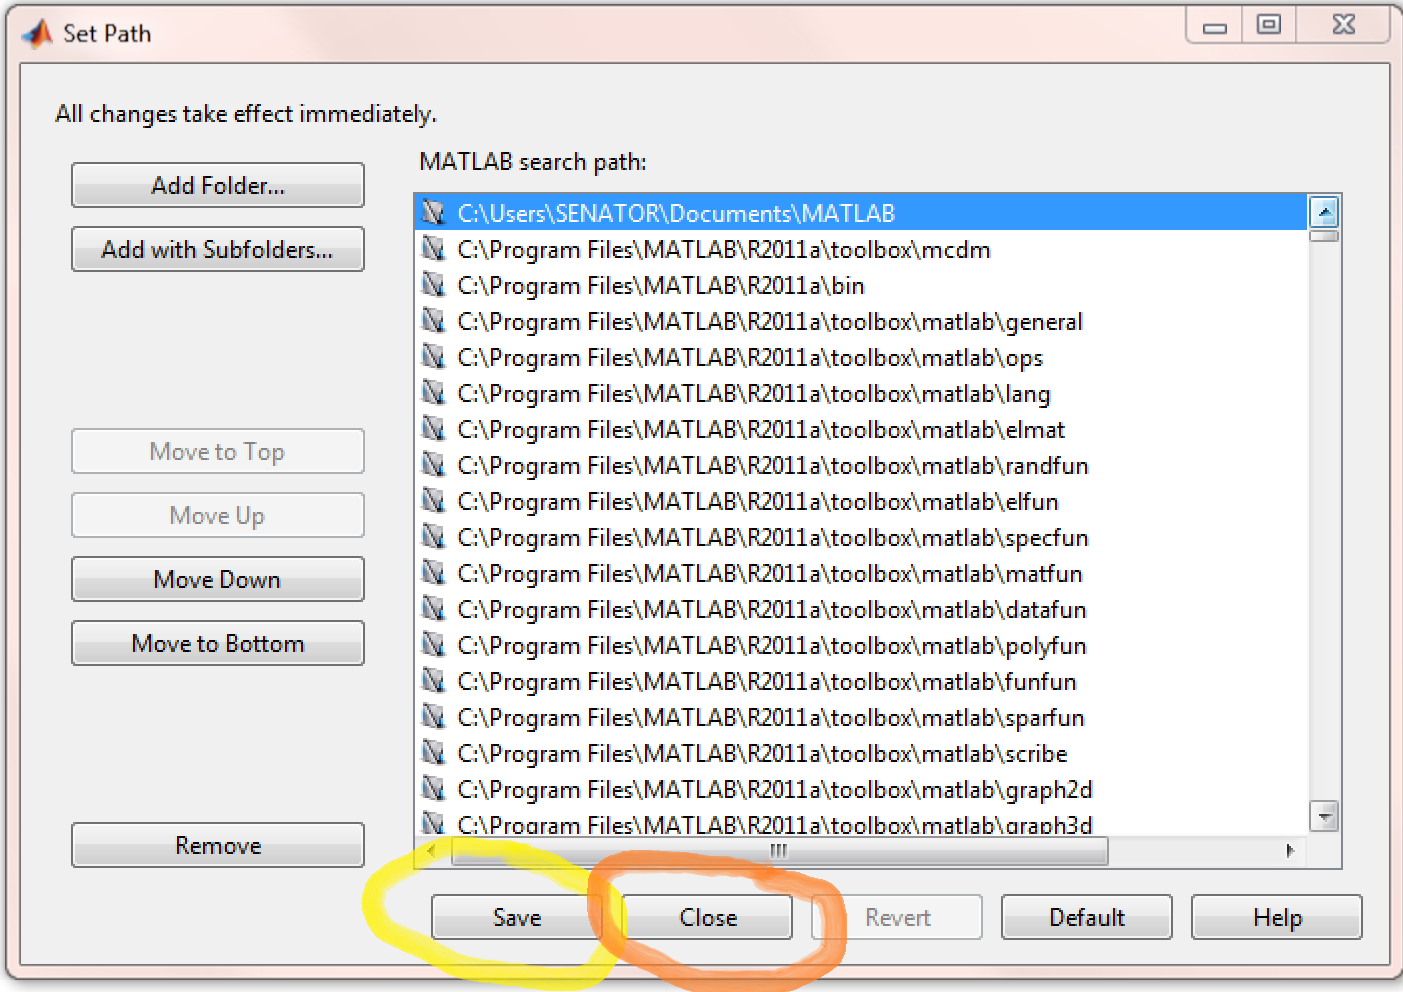
Step 8: Now click on save then click to close.
Step 9. Now click to Start button in the bottom left corner of the Matlab UI.
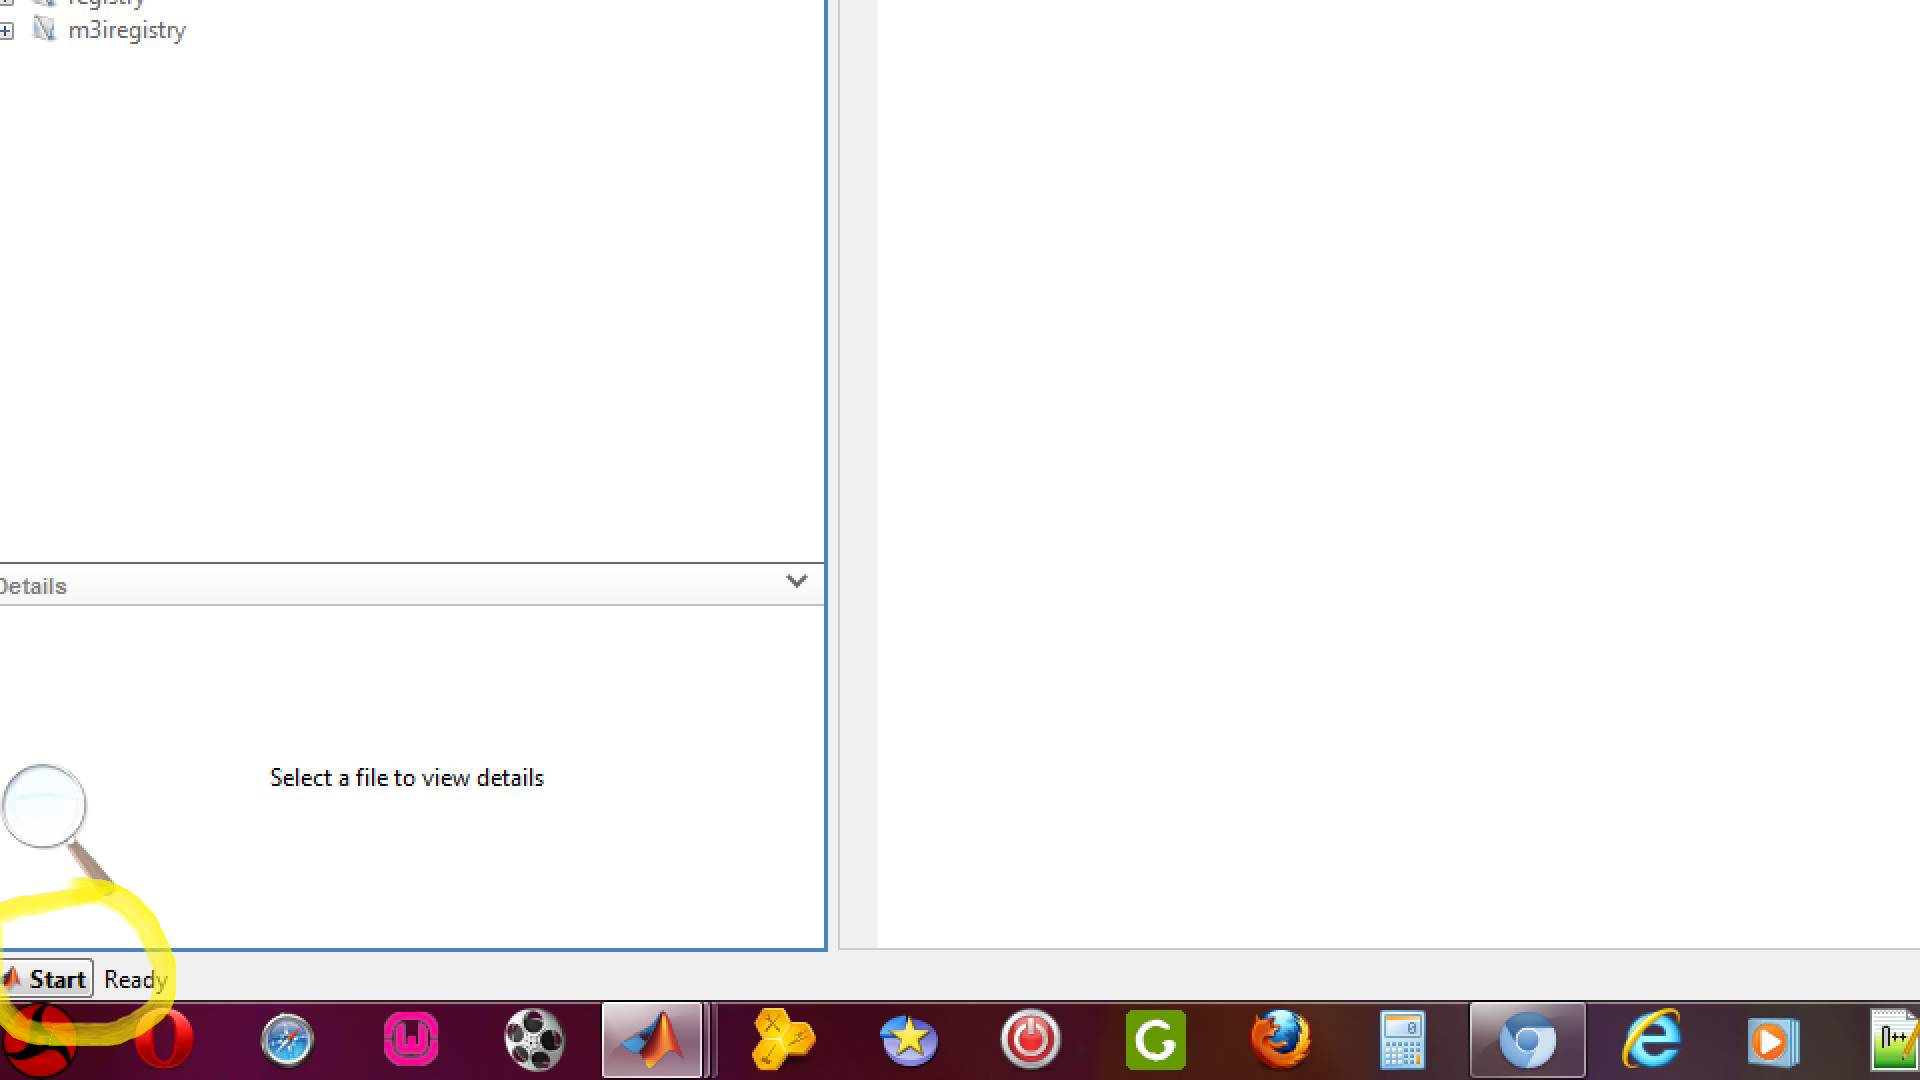
Step 10. When the Popup display shows, click to Desktop Tools and then to View Start Button Configuration Files..
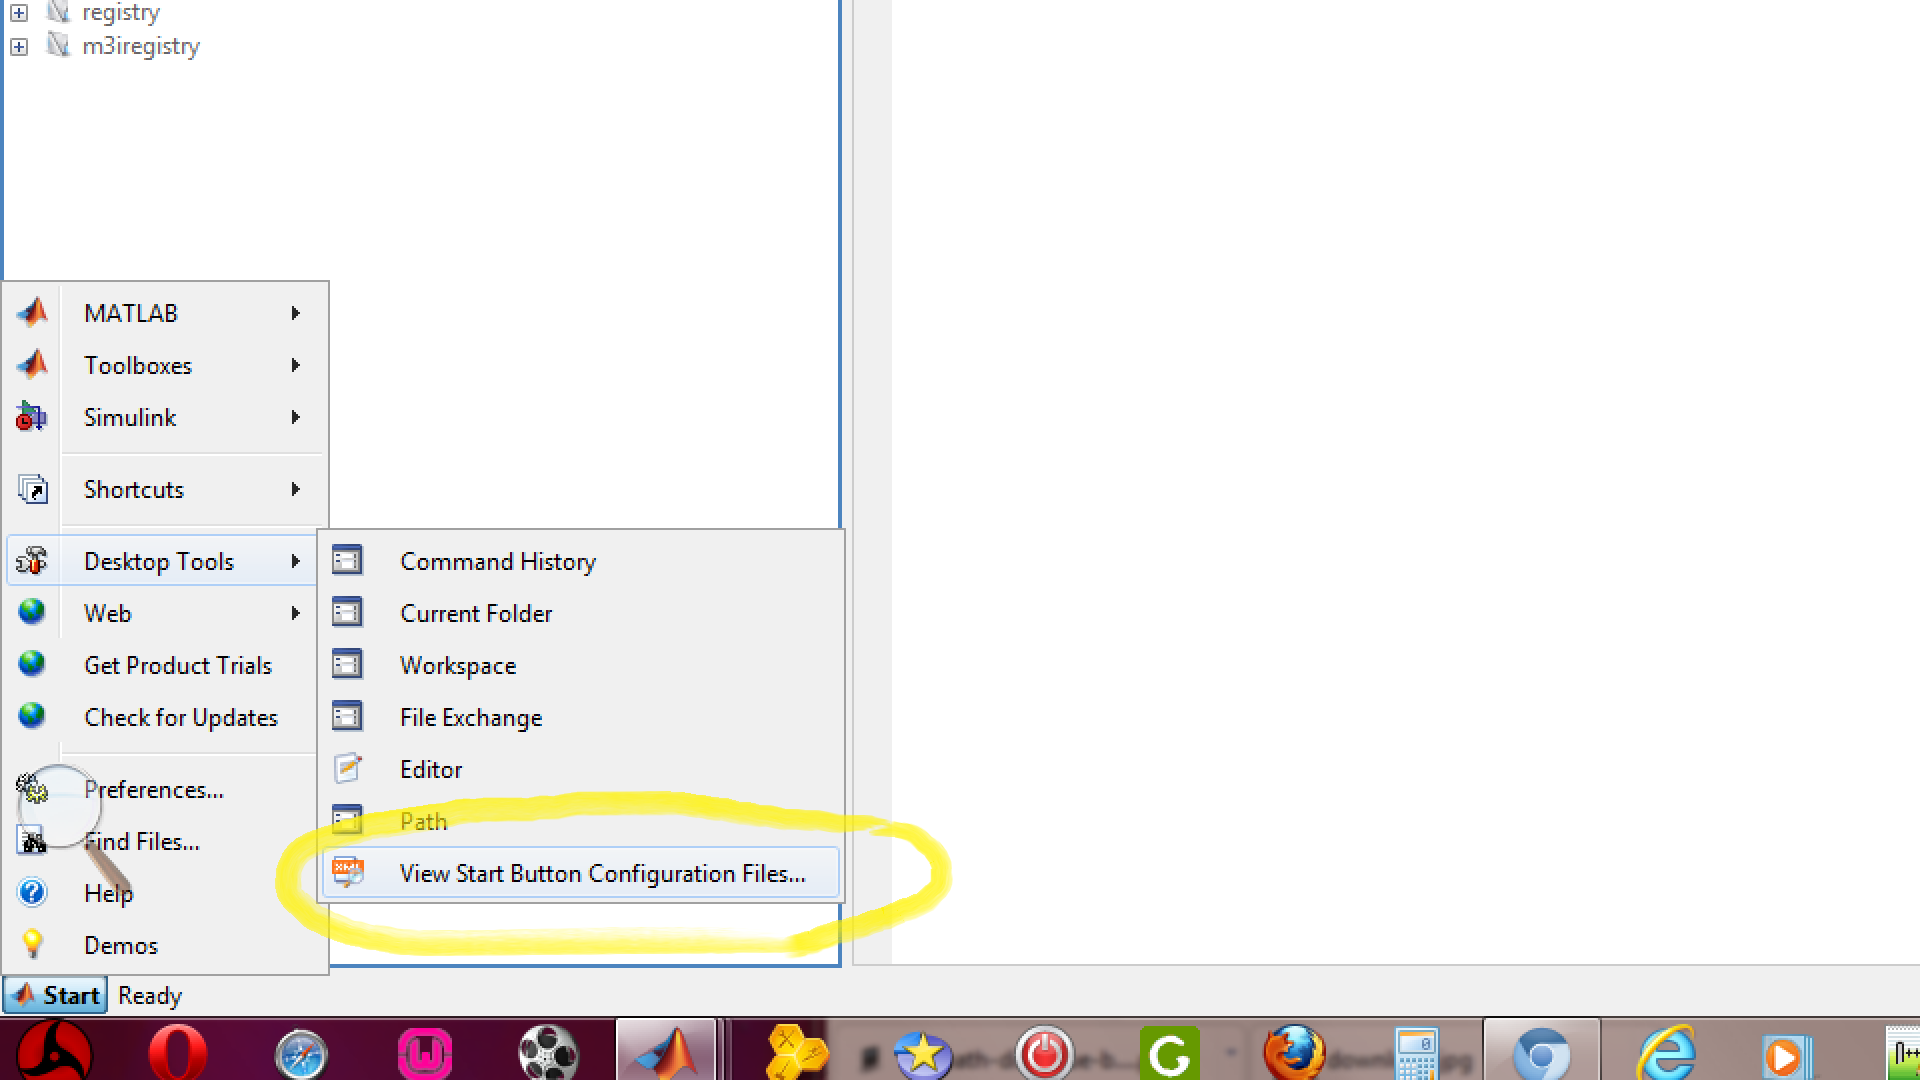
Step 11. Inside the Start button configuration files window search for your toolbox name in this case it will be MyToolbox under the Product category.
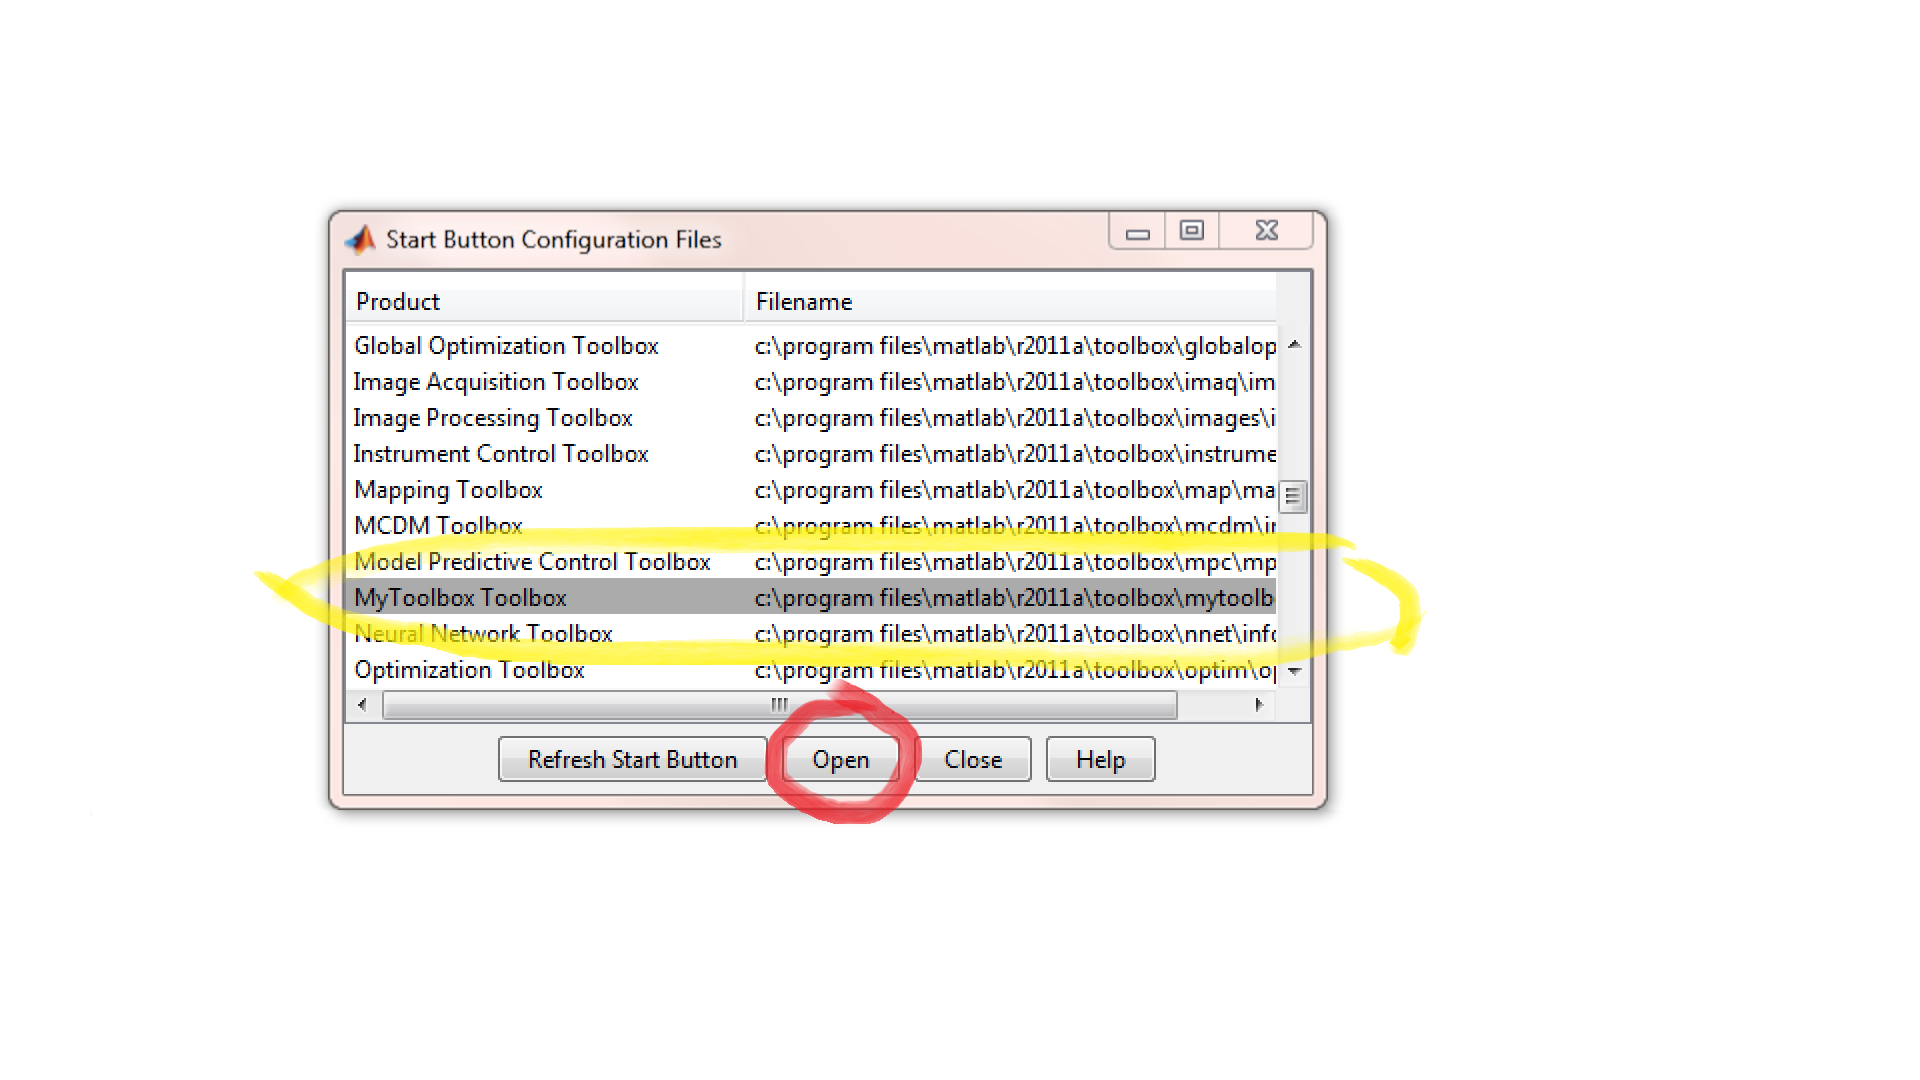
Step 12.Once you have found it , double click on it and an xml file will open.

Step 13. Inside the info.xml file edit it as follows:
- <name></name> In this tag you should write down your Toolbox name that is the name of your directory (In our example , MyToolbox). But fortunately what we see is that the directory name and the name in the <name> tag of the info.xml file both are same. So if you wish to change your toolbox name simple change the name of your directory and put that same name in the <name> tag. This is a convention which one should follow.
- <type></type>Type should be kept as toolbox. So we leave this part of the file unchanged.There are other types such as matlab,simulink,blockset and links_targets.
- <icon ></icon>This is where we put the path and name of the icon which we like to use for the Toolbox.
- <help_location></help_location>If you wish to provide any help. Here we place the path to help (HTML) folder.
- <help_contents_icon></help_contents_icon>The icon used for the help is provided here. Usually the icon which is used here is by default the Help browser TOC icon.
- <list></list>The list displays all the list items which are included under the Toolbox menu list.The tags which are used inside the <list> tag are as follows :
- <listitem></listitem>
The <listitem> tag is used for each individual items of the Toolbox menu list.Such that it starts with the list tag open and ends with list tag closed. Inside the list tag following tags are used.
- <label></label>The label tag simple labels the text for each items under the Toolbox menu list.
- <callback></callback>The callback tag is actually a command which opens a particular document having a name which is written in between the callback tags.
- <icon></icon>The icon tag is used to provide a icon for each items in the menu list of the Toolbox.
Step 14. After the editing the info.xml file press ctrl+s that is to save it and then close the file.
Step 15. Then in the Start button configuration file window click on refresh start button and finally close it.
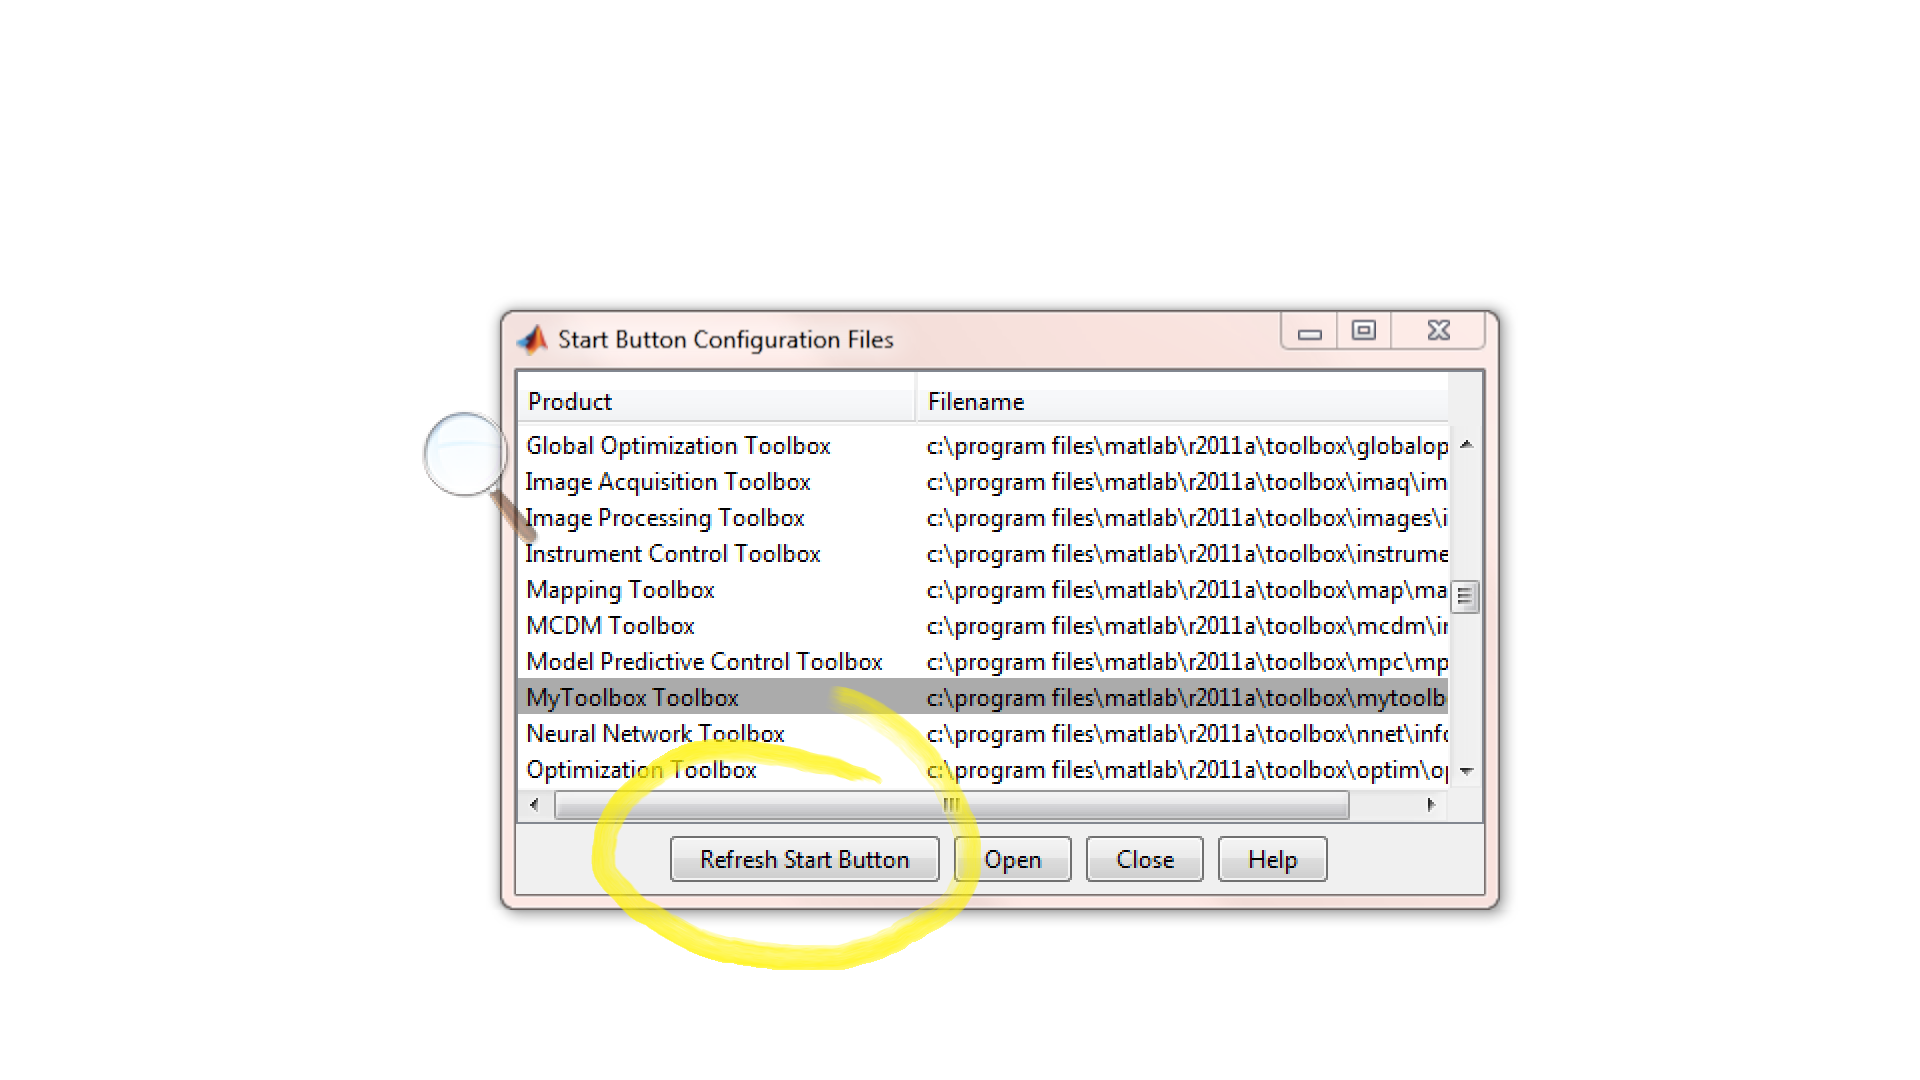
Step 16. After completing all the above steps you would find your Toolbox i.e. MyToolbox in the Start button->Toolboxes menu list.
Thank you for visiting our site , for any further questions please comment below.
Your questions shall be answered within 24hours.
🙂
