 It’s been quite a while I am using Ubuntu Linux as my primary Operating system. Before that, I was using Windows, and to be very honest, the migration from Windows to Linux was not really that much easy. One of the primary problems I found was the auto mount issues. Windows, by default, automatically mounts all the partitions it finds during boot. Linux, on the other hand, mounts only the ones needed, and the rest on demand. This was not really a big issue, until I started using some services which depend explicitly on fstab (file system tabular file, which is used during boot-time to auto mount the partitions). Before, I could just open Nautilus (the default file/directory browser on Ubuntu), and it would automatically mount a partition for me. For some services, like Samba share etc, I somehow had to auto-mount some of my NTFS paritions during boot time. The problem was some permission issues. When I manually mounted the partitions using Nautilus, the permissions are set automatically. But, using fstab file, something special was needed for proper permission. Otherwise, I would always endup getting “Insufficient Permission” error. Thanks to this and this guide of Ubuntu Wiki, I was able to auto mount the partition without any type of permission issues.
In this post, I’ve tried to explain the whole process in simpler words. After reading this tutorial you will be able to automatically mount all your NTFS partitions on your Ubuntu box properly. So let us start.
#1: The concept of auto-mounting:
Before we start, we need to study a file named fstab, located at /etc/fstab. It is a file which is interpreted during boot and the devices mentioned are automatically mounted on the said location. If we do a
cat /etc/fstab
Then we will find something similar to this:
# /etc/fstab: static file system information.
#
# Use 'blkid' to print the universally unique identifier for a
# device; this may be used with UUID= as a more robust way to name devices
# that works even if disks are added and removed. See fstab(5).
#
# <file system> <mount point>   <type>  <options>       <dump>  <pass>
proc            /proc           proc    nodev,noexec,nosuid 0       0
# / was on /dev/sda6 during installation
UUID=9043b8c2-d123-4fcb-837b-86a49d236073 /               ext4    errors=remount-ro 0       1
# swap was on /dev/sda5 during installation
UUID=4e4532d6-e6e6-40dd-b090-48a421994316 none            swap    sw              0       0
which means, only two of the partitions are automatically mounted during boot:
- The File System Partition: This is the partition where Ubuntu is installed. For my laptop, it is
/dev/sda6with a UUID (Unique device ID) … - The swap partition: Another system partition used by Ubuntu for paging.
Now, I have another partition, labeled Development which I use to store all my work related files. I want to automatically mount that as well. Let us see how.
#2: Locating the UUID of the partition:
As seen in the fstab file, the default partitions are mounted using UUID of the device. This is not necessary, but a good practice. The logical names, like sda, sda1, sda2 etc, might change if we alter the device configuration, but the UUID will always remain the same. So, we will follow some simple techniques to do it.
#2.1: Finding the logical name first:
By logical name, I am talking about the simple sdaX (where X is the partition number) type identifier of the partitions. Without having a full knowledge of the partitions, it is difficult to find it. As I had partitioned my HDD myself, so I always knew, it is sda3 which I wish to automount. But, you might find this reverse engineered approach useful.
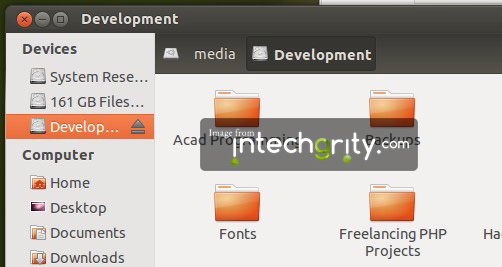
First, open Nautilus (by simply clicking on the Home icon on ubuntu dash) and open the partition. This will automatically mount it. Note down the location. For me, it was /media/Development

Now, open up a terminal (Ctrl+Alt+t) and type:
mount | column -t
This will show the mount information. As we have already mounted the partition, so it should be there already. The output for me was:
/dev/sda6         on  /                         type  ext4                   (rw,errors=remount-ro)
proc              on  /proc                     type  proc                   (rw,noexec,nosuid,nodev)
sysfs             on  /sys                      type  sysfs                  (rw,noexec,nosuid,nodev)
none              on  /sys/fs/fuse/connections  type  fusectl                (rw)
none              on  /sys/kernel/debug         type  debugfs                (rw)
none              on  /sys/kernel/security      type  securityfs             (rw)
udev              on  /dev                      type  devtmpfs               (rw,mode=0755)
devpts            on  /dev/pts                  type  devpts                 (rw,noexec,nosuid,gid=5,mode=0620)
tmpfs             on  /run                      type  tmpfs                  (rw,noexec,nosuid,size=10%,mode=0755)
none              on  /run/lock                 type  tmpfs                  (rw,noexec,nosuid,nodev,size=5242880)
none              on  /run/shm                  type  tmpfs                  (rw,nosuid,nodev)
gvfs-fuse-daemon  on  /home/swashata/.gvfs      type  fuse.gvfs-fuse-daemon  (rw,nosuid,nodev,user=swashata)
/dev/sda3         on  /media/Development        type  fuseblk                (rw,nosuid,nodev,allow_other,default_permissions,blksize=4096)
gvfs-fuse-daemon  on  /root/.gvfs               type  fuse.gvfs-fuse-daemon  (rw,nosuid,nodev)
Note the highlighted line. I used the path location /media/Development to track down the logical location /dev/sda3.
Recommended Reading:
#2.2: Finding UUID using logical location:
Now, we have to analyze the /dev directory to find out the UUID of the partition (ie, in my case, /dev/sda3). To do so, again, open up a terminal and type:
ls -l /dev/disk/by-uuid
This will give you an output like this:
total 0
lrwxrwxrwx 1 root root 10 Aug  2 23:42 4e4532d6-e6e6-40dd-b090-48a421994316 -> ../../sda5
lrwxrwxrwx 1 root root 10 Aug  2 23:42 5032E2C132E2AAE4 -> ../../sda3
lrwxrwxrwx 1 root root 10 Aug  2 23:42 9043b8c2-d123-4fcb-837b-86a49d236073 -> ../../sda6
lrwxrwxrwx 1 root root 10 Aug  2 23:42 BA4CBCF84CBCB10D -> ../../sda1
lrwxrwxrwx 1 root root 10 Aug  2 23:42 CA92DADA92DACA59 -> ../../sda2
Again note down the highlighted line. So I could finally find the the UUID of the partition is: 5032E2C132E2AAE4
A more robust way to get the UUID is to use blkid command.
sudo blkid
This will print something like:
/dev/sda1: LABEL="System Reserved" UUID="BA4CBCF84CBCB10D" TYPE="ntfs"
/dev/sda2: UUID="CA92DADA92DACA59" TYPE="ntfs"
/dev/sda3: LABEL="Development" UUID="5032E2C132E2AAE4" TYPE="ntfs"
/dev/sda5: UUID="4e4532d6-e6e6-40dd-b090-48a421994316" TYPE="swap"
/dev/sda6: UUID="9043b8c2-d123-4fcb-837b-86a49d236073" TYPE="ext4"
Where we can see our partition list and their respective UUIDs and other information.
#3: Editing the fstab file:
As said before, this file is responsible for automatically mounting the partitions during boot time. We already have two partitions (or even 1 depending on your installation) auto-mounted, let us now add our own. But before we do, lets take a peek into the file’s format.
#3.1: Understanding the fstab file format:
The file has 6 column for device mount attributes:
file system:
The logical representation of the partition. We can use the simple /dev/sda3 or in our case, we will use UUID=5032E2C132E2AAE4
mount point:
The path where the filesystem will be mounted. We shall use /media/Development, but you can use anything you want. It is a good practice to mount all partitions (except the system partitions) inside /media directory.
type:
The type of the file system. As we are mounting NTFS partition, we will use ntfs-3g which gives read/write access to this file systems of this type.
options:
This is the most important. Here we basically deal with how the partitions are mount and how the permissions will be set. We shall use the following option:
rw,auto,user,fmask=0111,dmask=0000
Which means that it will be accessible by everyone. As we do not want to complicate this tutorial, so we will not discuss about other parameters. Just know that, this option will be “enough” for regular usage.
dump & pass:
There parametes are not needed, and we shall pass a zero value (0).
#3.2: Updating the fstab file:
So finally, open the fstab file with your favorite editor. We are going to use the default gedit gnome editor.
sudo gedit /etc/fstab
At the end of the file, append this line:
UUID=5032E2C132E2AAE4 /media/Development ntfs-3g rw,auto,user,fmask=0111,dmask=0000 0 0
Make sure to change the UUID and mount point parameters. You can mount anywhere, but, as said before, you should mount somewhere inside the /media directory. Also make sure, the directory is not used by something else. Generally a directory having the same name as the label of the partition works fine (for me, it is Development).

Now simply restart your computer and now you should see the partition auto mounted at your location.
#3.3: Tracking a little fstab bug:
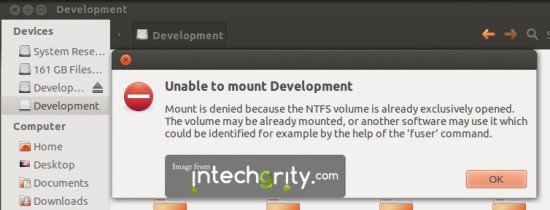
So, you have restarted your computer and now you are able to successfully access your partition, right? Well, you should be, but you might have noticed a little bug. If you have followed everything, then under the Devices section of Nautilus, you should see an identical entry for the auto mounted partition. One of the entry works fine, but when you click on the other, you might just see an error like this:

Now this isn’t a big issue, but if you are as skeptical as me, then you want to get rid of it. This is basically a bug reported long ago. I could find a reference here and as the solution say, open your fstab file again, and on the first line, where it says UUID=…, replace with /dev/disk/by-uuid/…
Now you know the reason, why I talked about listing the /dev/disk/by-uuid before. So finally this is the line which we should append in our fstab file.
/dev/disk/by-uuid/5032E2C132E2AAE4 /media/Development ntfs-3g rw,auto,user,fmask=0111,dmask=0000 0 0
Again restart your computer and you should see the duplicate entry gone.
Conclusion:
So that was all about automatically mounting NTFS partitions on Ubuntu. If you face any problem, feel free to ask us in the comments. And as usual, don’t forget to give your feedback.


thanks mate you really helped me!